
Videos and tutorials / nCloud Connect
nCloud Connect fax portal guide
Sending and receiving faxes in the nCloud Connect fax portal: logging in, your fax address book, cover pages, sending faxes, queueing and fax logs.
Fax login
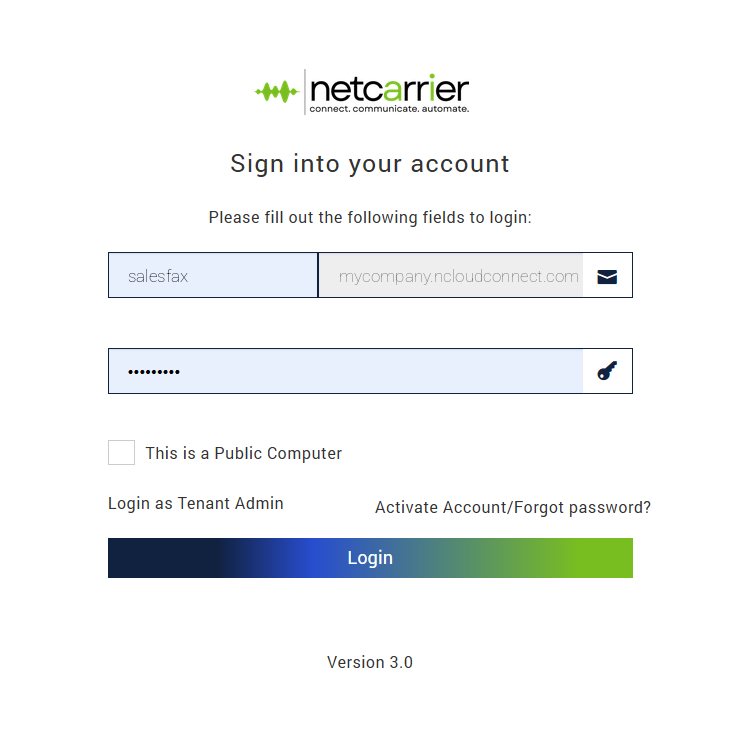
Logging in to your fax user is similar to logging into the standard user portal.
Simply enter the username, in this case, “salesfax”. Enter your password and click Login.
*For users with the fax feature tied to your user account, simply log in with your extension and user portal password as you normally would
Fax address book
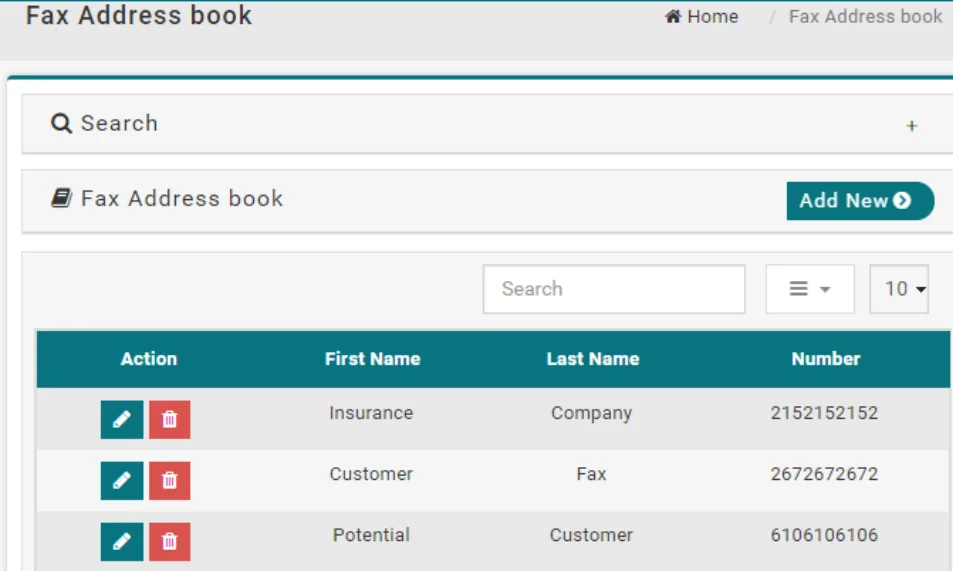
Your fax address book contains manually entered contacts for frequent faxing.
Here you can search for specific fax contacts and add new ones. You can also edit and delete existing contacts.
Anything contained in the address book will appear in the recipient field when sending a new fax.
Note, these entries will not appear in the global address book found in the admin portal.
Click  to create a new address book entry.
To edit an entry click 
To delete an entry click 
Create a fax contact
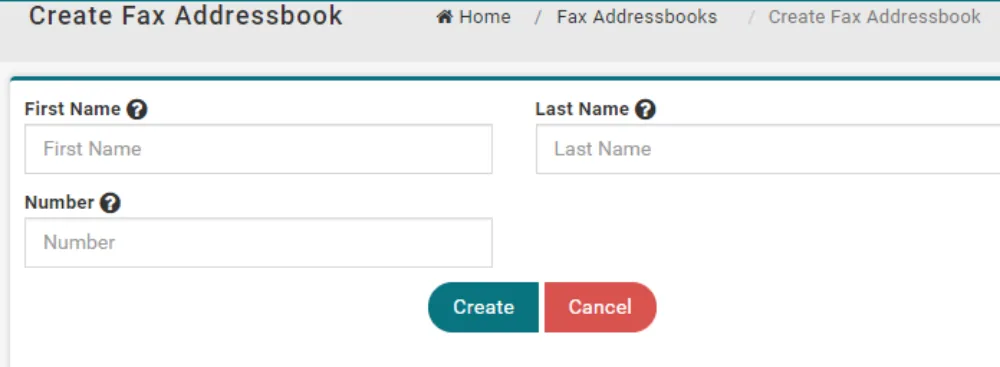
After clicking Add New you can enter a contact’s First and Last Name with their fax number. Click Create and you’ll see the new entry appear in your fax address book.
Cover pages
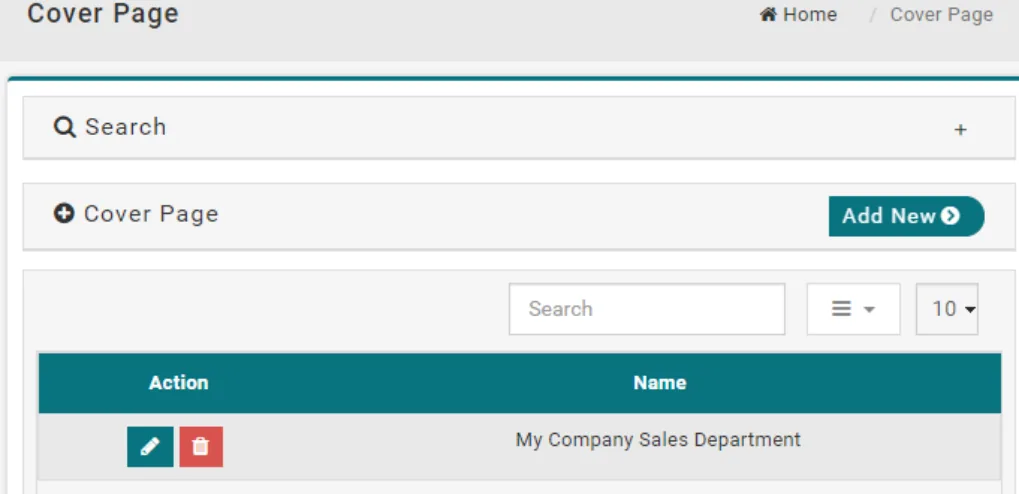
Cover pages can be created within the portal. They are stored here where they can be edited and deleted as needed.
To create a new cover page click the button.
To edit an existing cover page click 
To delete an existing cover page click
Create a cover page
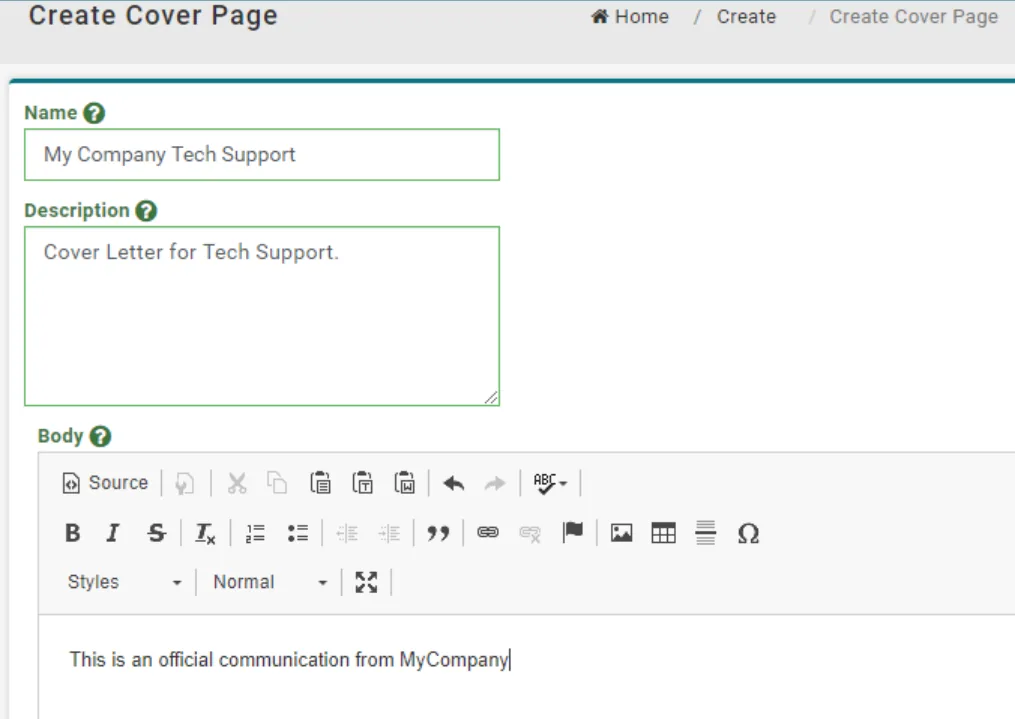
Here is where you create a new cover page from scratch.
The name of the cover page is for organizational purposes.
The description allows someone to see the purpose of the cover page at a glance.
The body contains the cover page itself. Here you can edit text, add images, and format the page to fit your faxing needs.
Send a fax – upload a file
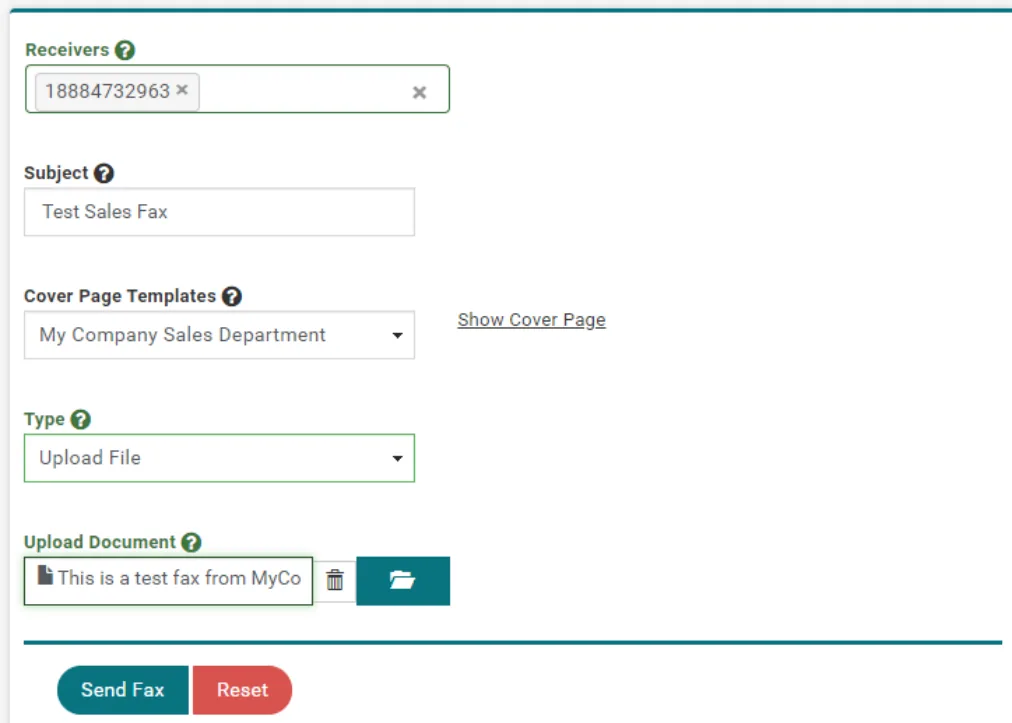
Here you will set up an outgoing fax.
Your receivers will either be address book entries or manually entered phone numbers. These can be toll free or 10 digit numbers.
The subject is the ATTN line of the fax.
The cover page can be the system default or one created by you as shown on the previous page.
In this example we’ll choose upload file from the "Type" dropdown.
To upload a .pdf or .tif file, click the folder icon and select your file.
Finally click Send Fax and check out your fax logs for a confirmation.
Send a fax – written fax
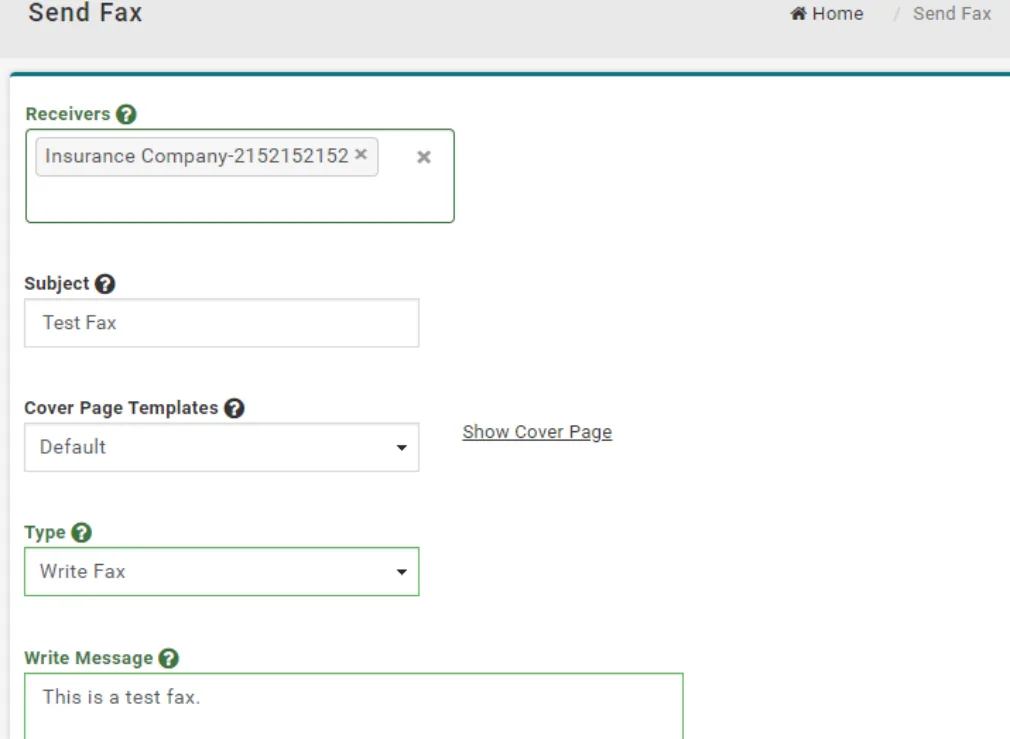
Here you will set up an outgoing fax.
Your receivers will either be address book entries or manually entered phone numbers. These can be toll free or 10 digit numbers.
The subject is the ATTN line of the fax.
The cover page can be the system default or one created by you as shown on the previous page.
In this example we’ll choose Write Fax from the "Type" drop down.
Simply write out your fax in the "Write Message" field.
Finally click Send Fax and check out your fax logs for a confirmation.
Fax queueing
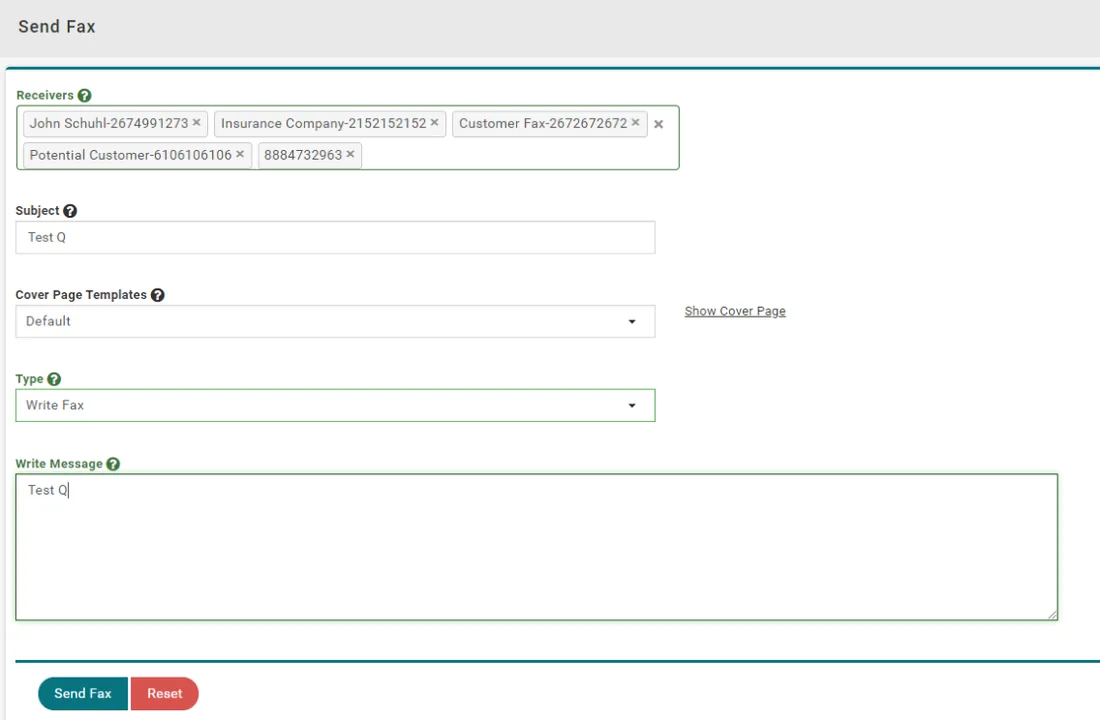
Fax queueing is a feature that allows you to send a fax to multiple recipients at one time.
Call paths are set by your administrator and will determine how many recipients you are able to include in one fax.
As an example, if your limit is set to 5 and you send to 10 recipients. The system will send the first five and then queue the remaining 5 in the list.
Maximum for recipients will always be 10.
Fax queue tracking
As an admin you can see the Fax Queue in
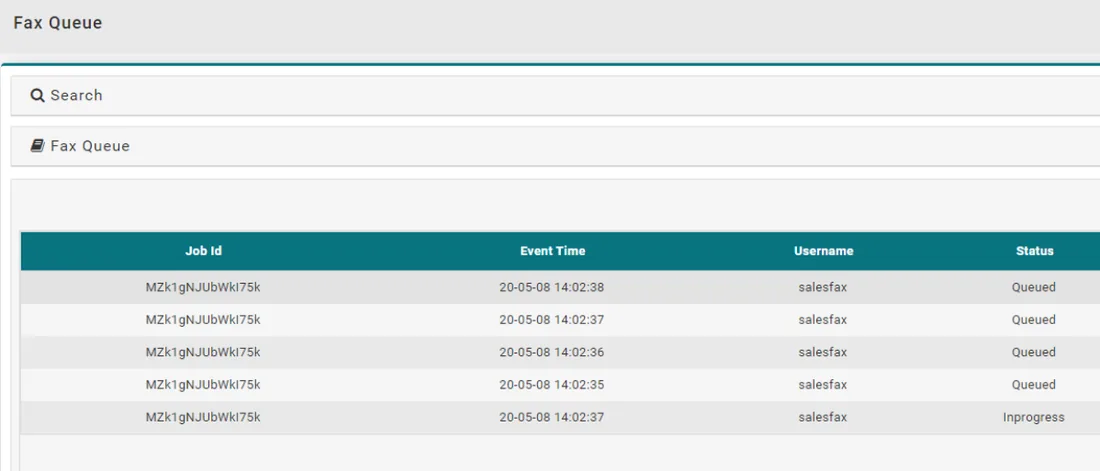
use by navigating to the Fax Queue page under Reports.
This page will allow you to see when the faxes were queued, which user initiated the fax, the status of each transmission, among a few other details.
Again, the maximum number of recipients that can be queued at one time is 10.
Fax logs
On this page you can view active and
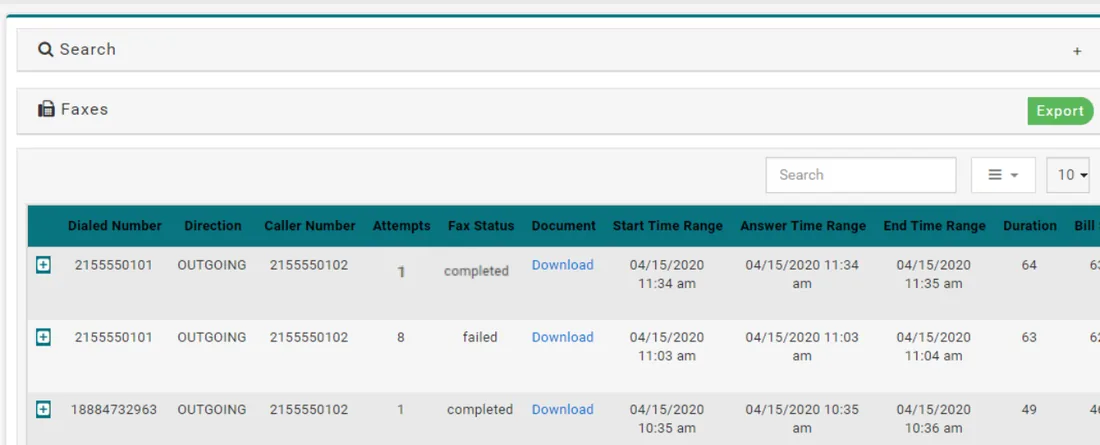
historical fax confirmations. Information
*If a fax fails or you receive a fax the system may send an email alert from "noreply@ncloudconnect.com". Remember to always check this page for the most accurate and up-to-date information.
regarding status, times, and parties are all included.
Dialed Number: The number the fax was sent to.
Direction: Indicates whether fax was incoming or outgoing.
Caller Number: The party that sent the fax.
Fax Status: Indicates whether the fax is in progress or has succeeded or failed.
Time Range: Indicates when the fax started, was answered, and ended.
Duration: How long the fax took to transmit fully.
Still stuck?
Our U.S.-based support team answers 24/7/365.