
Videos and tutorials / nCloud Connect
Call queueing: agent guide
How call queues work and how agents log in, take breaks, use the agent dashboard, make outbound calls and handle callbacks.
About queueing
Call Queues are a powerful tool for automatically answering and distributing inbound calls to a business or organization, providing a better experience for both callers and the agents answering calls in the queue. Instead of offering each new call to a group of phones as it comes in, regardless of the users’ disposition or activity, a call queue automatically greets each caller with a welcome message and places them in queue. Callers hear hold music or other custom messaging while they wait for an available agent. Meanwhile, the queue will offer these calls on a first-in-first-out basis to agents considered available to take a call, meaning logged in and not already on a queue call. Call offers that go unanswered simply return to the queue, to be offered to the next available agent.
What this means is that there are no ‘missed’ calls, no need to manually answer calls only to immediately place them on hold so the preceding call can be wrapped up. Agents can process one call at a time in an efficient manner while callers are able to wait with confidence that their call will be answered by the first available agent.
NetCarrier call queueing also offers enhanced metrics and reporting capability, outbound calling, recording functions, and several other features all geared towards creating an optimal phone environment for high-volume scenarios.
Logging in and out of queue
Agents are able to log in to begin taking calls from all queues to which they are assigned and log out when they no longer wish to receive those calls. This only applies to calls that would reach their extension through the queue, a direct call or transfer to their extension will ring regardless of queue status.
There are multiple ways to log in or out:
- Star codes Agents may use their phone or softphone to dial *86 to log in and *88 to log out. These star codes can be configured as speed dials for easy
access.
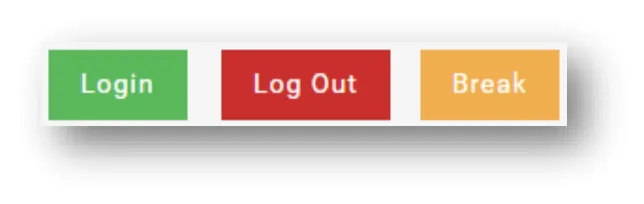
- Agent Dashboard Agents can log in and out using the buttons at the top of the Agent Dashboard in their nCloud User portal
Break status
In addition to logging in and out, Agents can mark themselves as unavailable by dialing *84 or using the ‘Break’ button in the Agent dashboard to set their status to ‘on break’. Use the Log in button or star code (*86) to become available once again.
Agent dashboard
When a user is assigned to one or more queues as an agent, they gain access to the Agent Dashboard in their nCloud user portal. The dashboard contains monitoring tools and controls for managing status as
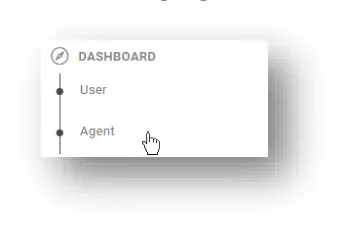
well as making outbound calls and callbacks.
The agent dashboard is accessed by clicking on the ‘Agent’ tab under the ‘Dashboard’ header at the top of the left side menu in the user portal.
Status controls
These controls, located at the top of the dashboard, allow an agent to control their queue status. When logged out or on break, only a green ‘Log In’ button will show. When logged in, agents will see buttons for logging out or going on break in red and yellow, as well as controls for selecting their Call Mode:

Inbound Agents set to inbound call mode are considered available to take calls from the queue. Agents are automatically set to inbound upon logging in. Outbound: This call mode allows an agent to make outbound calls associated with one of the queues they are assigned to, or to respond to Callback requests. Agents in outbound call mode are not offered inbound calls from the queue until their status is set to inbound once again.
Agent queue monitor
This section at the bottom of the dashboard displays the status of each queue the agent is assigned to and provides the following info:
- Queue Name Identifies the name and extension of the queue
- Agents Logged In Lists the number of agents assigned to that queue that are currently logged in
- Available Agents Lists the number of agents in that queue that are currently available to take an inbound call (excludes agents already on a queue call or in outbound status)
- Agents on Calls Lists the number of agents currently on a queue call
- Calls Waiting Lists the number of unanswered calls waiting in queue

Outbound calling
When an agent sets their call mode to ‘Outbound’ the agent dashboard will display the ‘Outbound Queue Calling’ controls immediately below the status controls at the top.
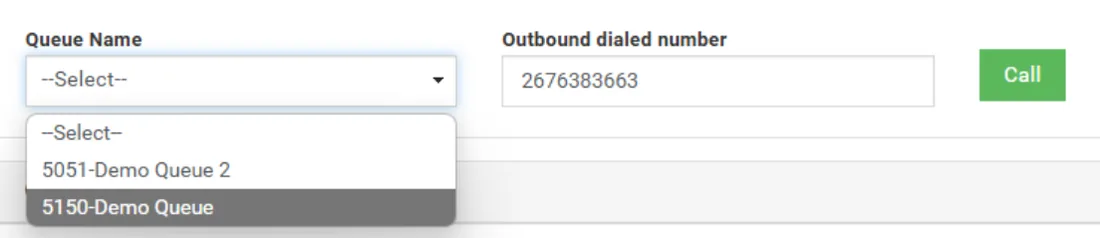
To make a call out from a queue, the agent must select a queue from the dropdown menu on the left, type the number they wish to call on the right, and click the green ‘Call’ button. Their extension will then ring and the system will make the outbound call to the intended destination once the agent answers.
Calls made in this manner will call out from the number associated with the queue in the nCloud admin portal and will be recorded in the queue statistics.
Note: Agents must set their call mode back to ‘Inbound’ to become available to take inbound calls once again after making an outbound call
Callbacks
If a queue has the Callback feature enabled, callers may opt to request a callback rather than wait in queue for their call to be answered. Callback requests are displayed in the ‘Callbacks’ section in the middle of the agent dashboard.

Each callback request will display the following information:
- Callback Ticket Code A unique number which is assigned to each callback request
- Callback Number Number at which the caller would like to receive the callback
- Call Queue Extension Number Extension of the queue from which the caller requested the callback
- Caller Number Number the caller’s initial call into queue came from
- Callback Agent Name After a callback has been attempted, this field will display the name of the agent who made the callback attempt
- Callback Status Tracks whether an agent has attempted to fulfill the callback request
- Start Time Displays the date and time the callback was requested
- Callback Last Attempt Time Displays the date and time the callback was last attempted
To attempt a callback, an agent must be set to ‘Outbound’ status. They can then click on the blue ‘Call’ button to the left of the callback request. Their extension will then ring and the system will make the outbound call once they answer
Searching callbacks
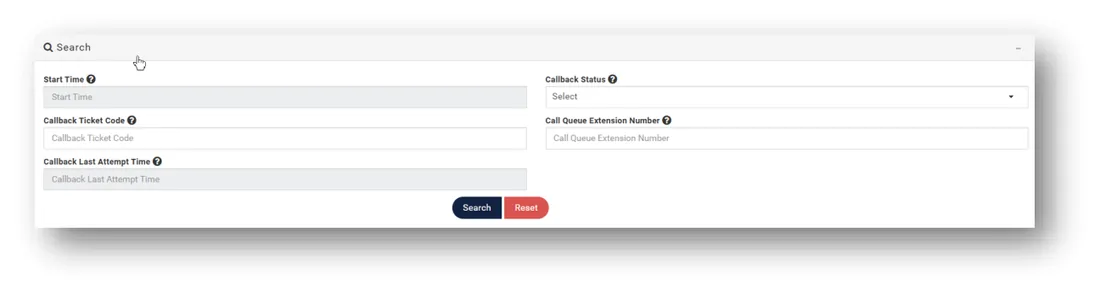
The agent dashboard also contains an interface for searching callbacks which can be viewed by clicking on the grey ‘Search’ bar above the Callbacks section. This will expand the search section and display several fields which an agent may use to search for previous callbacks:
- Start Time Searches for callbacks requested within the entered time period
- Callback Ticket Code Searches for callbacks by unique ticket code number
- Callback Last Attempt Time Searches for callbacks last attempted within the entered time period
- Callback Status Searches for callbacks by attempt status
- Call Queue Extension Number Searches for callbacks by queue
Results are displayed in the ‘Callbacks’ section after the agent clicks the blue ‘Search’ button. To reset the ‘Callbacks’ section to the default view displaying current and recent callbacks, click the red ‘Reset’ button.
Still stuck?
Our U.S.-based support team answers 24/7/365.