
Videos and tutorials / nCloud Connect
Connect2Teams calling guide
Placing and receiving calls in Microsoft Teams with Connect2Teams, plus hold, transfers and conference calls.
Overview
various in-call controls including transfers, holds, and conferencing.
Teams dialer layout
Once the Connect2Teams service has been activated, a new tab labeled ‘Calls’ will appear on the Teams sidebar. This tab contains the dialer along with a call history, contact lists, and various other settings:
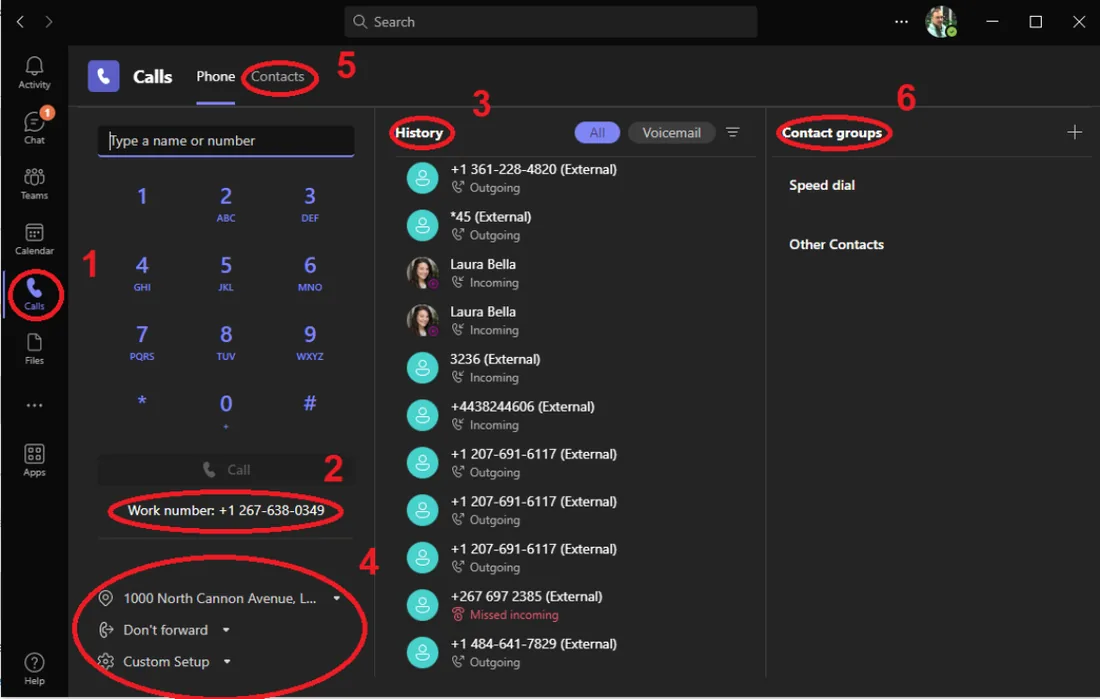
- ‘Calls’ tab sidebar button
- DID associated with the user
- Call History
- E911, forwarding, and device settings
- Contact management page
- Contact groups
Placing a call
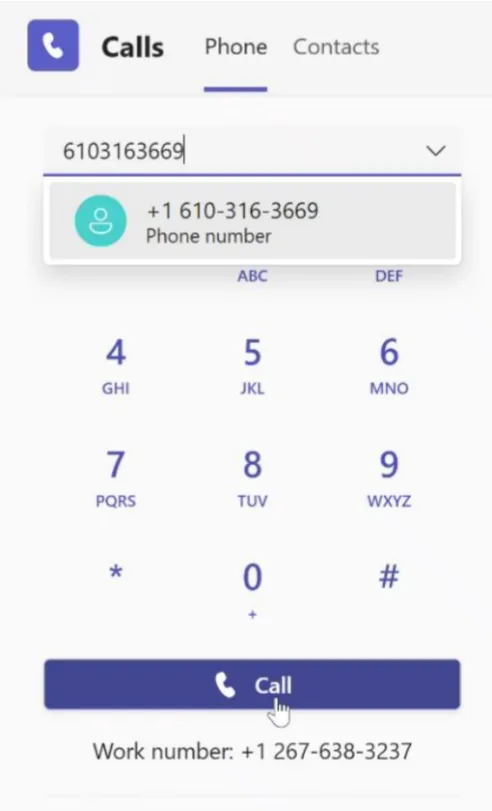
To make a call, simply type a name or number into the field above the dialer and press the ‘Call’ button. This will open a separate Teams window for the call.
Note: This window must remain open for the duration of the call; closing the window will terminate the call.
Once the active call window loads, user will hear ringback tone while their call waits to be connected.
Receiving a call
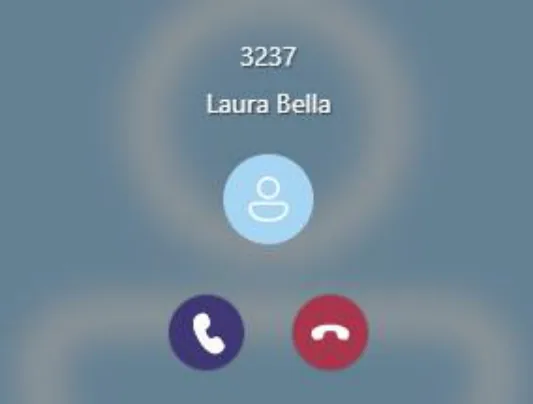
When receiving a call, a desktop notification will display with buttons to either accept or reject the call.
Similar to placing a call, answering a call will open a separate Teams window for the call.
Active call window layout
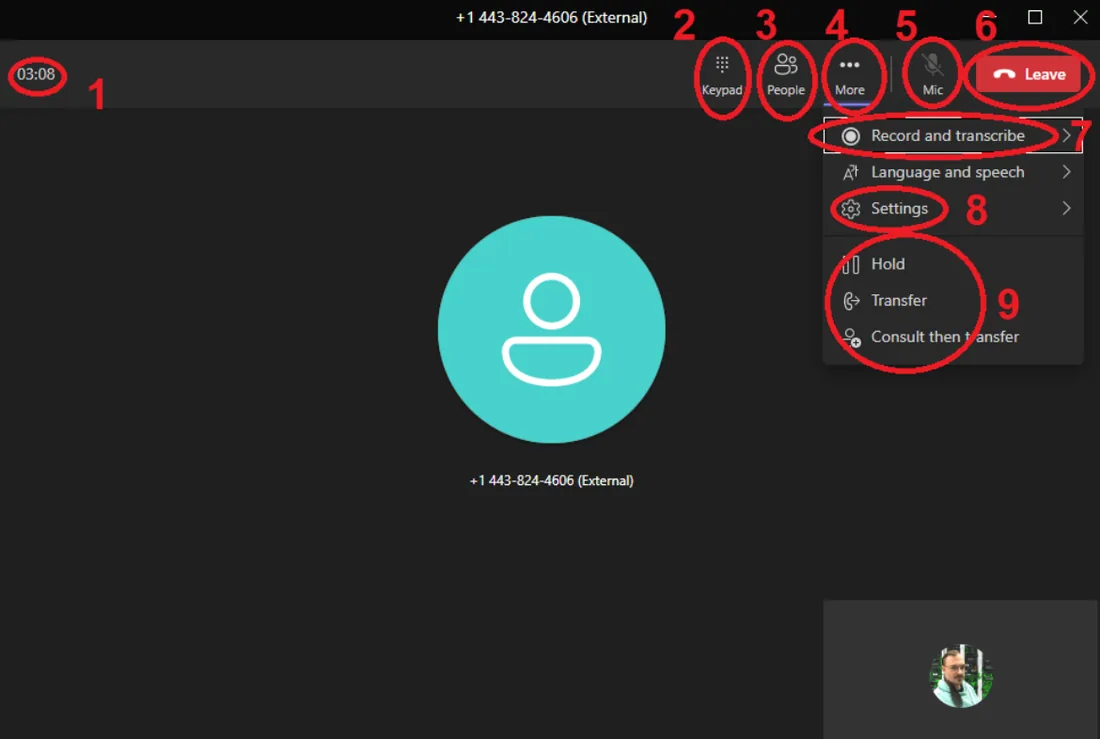
- Call duration counter
- In-call Keypad (for use with Auto Attendants and VM prompts)
- People menu for displaying current participants of call and adding others
- More options menu (currently expanded, displaying items 7, 8, and 9)
- Microphone mute
- Terminate the call
- Recording and transcription menu
- Additional settings including Device Settings for selecting microphone and speakers
- Call controls
Call controls – hold

To place a call on hold, select the ‘Hold’ option (item 9 in the layout) under the ‘More’ settings menu in the top right corner (item 4 in the layout). The display will change to indicate the call is on hold and a button to resume the call will appear.
Call controls – transfers
There are two modes of transfer available – ‘consultative’ and ‘blind’.
- A blind transfer will send the caller as soon as a destination is selected.
- A consultative transfer will first connect the user with the transfer destination while the caller waits on hold. The user can then cancel the transfer or complete it after the consult call.
For both transfer types, a caller will be automatically placed on hold while the user enters the transfer destination or consults – there is no need to place a call on hold before transferring.
Blind transfer
- To send a blind transfer, select the ‘Transfer’ option
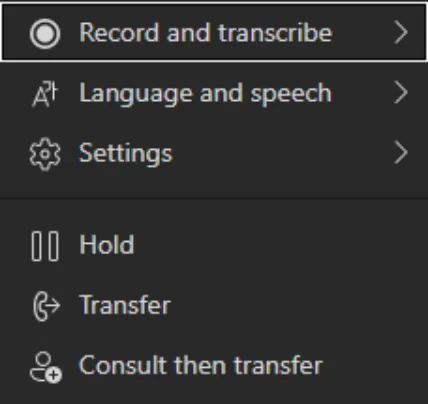
under the ‘More’ settings menu.
- The call will go on hold and a window will pop up prompting the user to enter a name or number.
- Once the destination is entered, the user may select ‘Transfer’ and the call will be sent.
Note: The user may choose to have the transfer ring back to them if the destination does not answer using the slider just above the transfer/cancel buttons.
Consultative transfer
- To send a consultative transfer, select the ‘Consult then transfer’ option under the ‘More’ settings menu.
- The call will go on hold and a window will pop up prompting the user to enter a name or number.
- Once the destination is entered, the user may select ‘Consult’ to place a call to the transfer destination. This will open another separate Teams window for the consult call.
- Once they have finished the consult call, the user may either select the ‘Transfer’ option at the top of the screen to complete the transfer (shown below) or select the ‘Leave’ option to cancel.
- If cancelling, this will close the consult window and the user may return to the original active call window to resume the call.

Conference calls
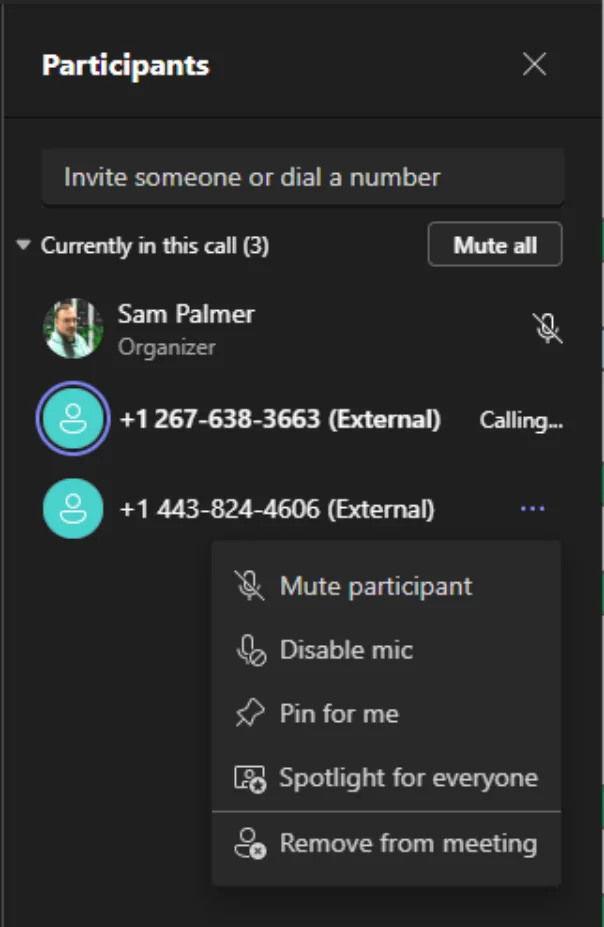
To conference another participant into an active call, select the ‘People’ tab at the top of the active call window (item 3 in the layout) This will display a sidebar showing all current participants. At the top of the list there will be a field in which the user can enter a name or number of a person to add to the call. The new user will be added to the call after their information is entered.
Note: Additional controls for participants can be found by clicking on the three dots to the left of their name or number in the People menu.
Still stuck?
Our U.S.-based support team answers 24/7/365.